

Painting ideas for beginners: 25 easy things to paint on a canvas

The best painting ideas for beginners have big shapes, few colors and no faces or hands: a sunset gradient, a row of misty mountains, a single lemon, one large leaf, a taped color-block abstract. Each one can be finished in a single sitting, and each one teaches a technique you will use in every painting after it.
Below are 25 ideas grouped by type. Every idea names the reason it is forgiving and the one skill it trains. The advice assumes acrylic paint, because it dries fast and a mistake can be painted over within half an hour.
A short starter kit
You need less than the art store suggests. This is enough for all 25 ideas:
- Paint: titanium white, a primary yellow, a primary red, ultramarine blue and burnt umber. Buy a large tube of white, because you will use it up three times faster than the rest.
- Brushes: a flat brush about 2.5 cm (1 in) wide, a round brush around size 6, and a small round for details. Synthetic bristles suit acrylic.
- Surface: two or three pre-primed canvases or canvas boards, around 30x40 cm (12x16 in). Smaller canvases feel safer but force fiddly brushwork.
- The rest: a jar of water, a rag, masking tape, and a plate or sheet of baking paper as a palette.
Skip black for now. Ultramarine mixed with burnt umber gives a dark that looks richer and teaches you to mix.
Painting ideas on canvas: skies and landscapes
Skies are the classic first subject because nobody can tell you a cloud is the wrong shape.
1. Sunset gradient. Bands of yellow, orange and pink blended into each other. It teaches wet-on-wet blending, and there is a full step-by-step further down.
2. Night sky with stars. A dark blue gradient, then white paint flicked from an old toothbrush. You learn spattering, and random stars always look right.
3. Misty mountain layers. Four or five overlapping ridges, each one darker than the one behind it. This teaches value: mixing one color in steps from light to dark.
4. Ocean horizon. Sky above, sea below, with tape across the canvas to keep the horizon straight. It trains long, level strokes with a flat brush.
5. Clouds over a field. Paint a blue sky, let it dry, then scrub on white with an almost dry brush. That is dry brushing, and soft, uneven edges are the goal.
Easy painting ideas in abstract
Abstract work removes the fear of getting a likeness wrong, so you can pay attention to the paint.
6. Taped color blocks. Divide the canvas with masking tape, fill each section with a flat color, then peel. You get crisp edges for free and practice mixing an even, opaque coat.
7. One color plus white. Pick a single blue and paint shapes in five different tints of it. A painting in one color cannot clash, and it trains your eye for light and dark.
8. Palette knife texture. Spread thick paint with a plastic palette knife or an old bank card. It teaches impasto, which means leaving the paint thick enough to stand up.
9. Overlapping circles. Trace around cups and bowls, then fill the circles and the overlaps in different mixes. You practice mixing a third color from two neighbors.
10. Loose brushstroke study. Cover the canvas in short strokes of three related colors, such as blue, green and turquoise. It shows you what each brush does at different pressures.
Sell your art with Printumo
Get started with selling your art as canvas and fine art prints
What to paint on a canvas from your kitchen table
Still life is patient. The subject does not move, and you control the light.
11. A single lemon. One shape, one color family, one cast shadow. It teaches how a light side, a dark side and a shadow make a flat shape look round.
12. A pear. Slightly harder than the lemon because the form is two spheres joined together.
13. A plain mug. The opening is an ellipse, and learning to paint one ellipse prepares you for every bowl, glass and vase.
14. A glass bottle. Paint it as a dark shape, then add two or three bright highlights at the end. You learn that shine is mostly a few well-placed light marks.
15. An egg on a white cloth. Almost no color at all, so the whole exercise is subtle grays. It is the fastest way to learn to see small changes in value.
Botanical ideas
Plants are irregular by nature, so a crooked stem looks natural.
16. One large leaf. A monstera or fern leaf filling the canvas. You practice mixing several greens from yellow, blue and a touch of red rather than using green straight from a tube.
17. Lavender stems. Thin green lines with rows of purple dabs. It teaches you to make a mark with one press of the brush and leave it alone.
18. Cherry blossom branch. A dark branch, then pink blossom dabbed on with a round brush or a cotton swab. Small repeated marks build a convincing whole.
19. A cactus in a pot. A cactus is a cylinder, so you blend from light on one side to dark on the other. That shading works on any rounded object.
20. A wildflower field. A green gradient with dots of color that get smaller toward the horizon. It introduces depth through size.
Simple animals
Keep animals to silhouettes and simple shapes at first. Fur and eyes can wait.
21. Birds on a wire. Black silhouettes against the sunset from idea 1. It teaches painting a clean shape over a dry background.
22. A goldfish. An orange oval with a fan-shaped tail, each made in a stroke or two. You learn to let the shape of the brush do the drawing.
23. A cat seen from behind. Two rounded shapes, two triangles for ears and a tail, sitting on a windowsill. No face is needed, and the pose is instantly recognizable.
Patterns
24. Stripes. Bands of different widths across the whole canvas, freehand or taped. Stripes train brush control and show how colors change next to each other.
25. Dots. Rows or rings of dots made with the handle end of a brush, a pencil eraser or a cotton swab. You learn how much paint to load for a consistent mark.
Painting ideas for beginners step by step: a sunset gradient
Use a 30x40 cm (12x16 in) canvas, your flat brush, and white, yellow, red and blue. Allow about 45 minutes including drying.
- Set out the paint. Squeeze out yellow, red, white and a small amount of blue. Mix an orange from yellow and red, a pink from red and white, and a purple from red and blue.
- Dampen the brush. Dip it in water and blot it on the rag. A damp brush lets acrylic glide, while a dripping one makes the paint streaky.
- Start at the horizon. About a third of the way up the canvas, paint a band of yellow mixed with a little white, using long horizontal strokes from edge to edge.
- Work upward. Add a band of orange above the yellow, then pink, then purple at the top. Do not let yellow and blue touch directly, because they mix to green. The pink between them prevents that.
- Blend the joins. While the paint is still wet, wipe the brush and stroke back and forth along each border until the line disappears. Work quickly. Thin acrylic starts to set in 10 to 20 minutes.
- Let it dry. Wait 20 to 30 minutes until the surface is dry to the touch.
- Add the land. Mix a dark from blue and burnt umber and fill the lower third with a flat shape: low hills, a treeline or a row of rooftops.
- Finish with the sun. One small dot of white with a touch of yellow, just above the horizon. Then stop.
What to do when a painting goes wrong
Acrylic is opaque once dry, so most mistakes are a 20-minute problem.
- Wrong shape or color: let it dry fully, then paint over it. Painting into half-dry acrylic lifts the layer underneath and makes a patchy mess.
- Muddy colors: mud comes from mixing too many pigments. Limit each mix to two colors plus white, and rinse the brush between colors.
- Something feels off but you cannot name it: stand 2 meters (about 6 feet) back, or take a phone photo and switch it to black and white. Usually there is not enough contrast between light and dark.
- The whole thing failed: cover the canvas with white paint or acrylic gesso and reuse it. A hidden first attempt costs nothing.
One more rule saves many paintings: stop a little before it feels finished. Most beginner paintings are spoiled by the last ten minutes of fiddling.
When you have a painting you like
A painting you are proud of does not have to stay a single object. You can photograph it and have it printed as often as you want, for your own walls, for family or to sell.
- Photograph it properly. Even light and a camera held square to the canvas matter more than the camera itself. The steps are in how to photograph artwork for print.
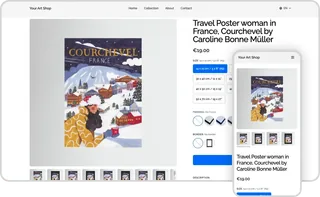
- Print on demand. With Printumo you upload the photo and each print is made only when someone orders it, on canvas or fine art paper, framed or unframed. An account is free, and you pay for printing and shipping only when a print is ordered.
- Sell if you want to. If friends start asking for copies, selling art online explains how prints reach buyers without you packing parcels.
Frequently asked questions
What should a beginner paint first?
Start with a sunset gradient or a taped color-block abstract. Both use large shapes and three or four colors, and neither depends on drawing skill.
What is the easiest thing to paint on a canvas?
Skies, silhouettes and simple patterns are the easiest things to paint on a canvas. A gradient sky with a dark treeline on top hides uneven brushwork and still looks deliberate.
Which paint is best for beginners?
Acrylic. It thins and cleans up with water, dries in minutes, and covers its own mistakes once dry. Oil paint blends more slowly and smoothly but needs more equipment and far more drying time.
What size canvas should a beginner use?
Around 30x40 cm (12x16 in) is a good first size. It is large enough for a 2.5 cm (1 in) flat brush and loose strokes, and small enough to finish in one sitting.