

How to make prints of your art

To make prints of your art, you turn the original into a digital file and then print that file. The process has five steps:
- Digitize the artwork by scanning or photographing it.
- Clean up the file and check the color against the original.
- Check that the file has enough pixels for the sizes you want.
- Choose paper or canvas.
- Print at home, at a local print shop, or through print on demand.
A print can never be sharper or more accurate than the file it comes from, so the first step matters most.
Scan or photograph: how to digitize artwork for printing
Scanning gives the most even, accurate result for flat work that fits the scanner. Photographing is the way to digitize anything large, textured or on stretched canvas.
| Method | Best for | Maximum artwork size | Texture and glare | Cost |
|---|---|---|---|---|
| Flatbed scan | Watercolor, ink, pencil and other flat work on paper | The scanner bed, usually about A4, or A3 on larger models | Even light and no glare on matte work. Flattens heavy texture | Low if you own a scanner |
| Scan in sections and stitch | Flat work larger than the bed | A few times the bed size | Same as a flatbed. Seams can show if the sections do not overlap enough | Low, but takes time |
| Photograph it yourself | Canvases, large pieces, thick or textured paint | No limit | Shows texture. Glare is the main risk on glossy paint | Low if you own a camera and tripod |
| Professional capture | Important pieces and work you plan to sell at large sizes | No practical limit | Controlled by the studio | Paid per artwork |
Scanning settings
Scan at 300 to 600 dpi at the original size. At 300 dpi you can print at the same size as the original. Go higher if you plan to enlarge: an A4 painting scanned at 600 dpi gives about 4960 x 7016 pixels, enough for an A2 print.
Save the scan as a TIFF or PNG, which keep every pixel intact. Turn off automatic color correction and automatic sharpening in the scanner software.
For larger work, scan overlapping sections and join them with the photo merge function in your editor.
Photographing basics
To turn a canvas painting into prints, photograph it:
- Light: place two matching lights, one on each side, at about 45 degrees to the artwork so the light is even and does not bounce back into the lens.
- Position: hang the artwork flat on a wall and set the camera square to it, with the lens aimed at the center.
- Stability: use a tripod, the lowest ISO setting, and a timer or remote so the camera does not move.
- Framing: fill the frame with the artwork.
- Timing: shoot before varnishing and before framing behind glass, because both add reflections.
The full method is in how to photograph artwork for print.
Clean up the file and check the color
Work in this order in a photo editor:
- Crop to the edges of the artwork and straighten it.
- Set the white balance. On work with bare paper showing, click the white balance tool on the paper so it reads as neutral.
- Remove dust, hairs and scanner specks with the healing tool at 100% zoom.
- Put the original next to the screen in daylight and compare. Adjust brightness and color until they match as closely as the screen allows.
- Sharpen lightly or leave it alone. Oversharpening puts bright halos around edges, and they show in print.
Export a copy in the sRGB color space and keep your edited master file. Prints tend to look a little darker than a backlit screen, so only a test print settles the question.
Check that the file has enough pixels
Resolution is the number of pixels divided across the printed size. Fine art paper is viewed up close and looks best at 300 DPI. Canvas has a woven surface that hides fine detail, so 150 DPI is enough.
The formula: pixels = cm / 2.54 x DPI.
| Pixels needed | |
|---|---|
| Paper A4 (21 x 29.7 cm) at 300 DPI | 2480 x 3508 |
| Paper 30 x 40 cm at 300 DPI | 3543 x 4724 |
| Paper 50 x 70 cm at 300 DPI | 5906 x 8268 |
| Paper 70 x 100 cm at 300 DPI | 8268 x 11811 |
| Canvas 30 x 40 cm (12 x 16 in) at 150 DPI | 1800 x 2400 |
| Canvas 50 x 70 cm (20 x 28 in) at 150 DPI | 3000 x 4200 |
| Canvas 60 x 90 cm (24 x 36 in) at 150 DPI | 3600 x 5400 |
| Canvas 100 x 150 cm (40 x 60 in) at 150 DPI | 6000 x 9000 |
A worked example: a 24 megapixel camera produces a file of about 6000 x 4000 pixels. If the painting fills the frame, that covers a 60 x 90 cm canvas and a 30 x 40 cm paper print, but falls short of 300 DPI on a 50 x 70 cm paper print.
Sell your art with Printumo
Get started with selling your art as canvas and fine art prints
Tips by medium
How to make prints of watercolor paintings
Scan watercolors if they fit the bed. Press the paper flat, because buckled paper casts soft shadows.
The hard part is the paper white. If you brighten the file until the paper is pure white, the palest washes vanish with it. Keep the paper just below pure white and check that your lightest wash is still visible.
How to make prints of paintings in acrylic or oil
Photograph these. Glossy paint and raised brushstrokes catch the light, so check the test shot for bright spots and move the lights further to the sides until they go. Wet oil paint cannot go on a scanner, and oil stays soft for a long time.
Pencil and charcoal
Loose charcoal and soft graphite smudge on scanner glass. Fix the drawing first, lower it straight onto the glass without sliding, and clean the glass afterward. Scans of drawings often come out gray. Lift the white point with the levels tool until the paper is clean, and stop before the lightest pencil lines fade.
Digital art
You already have the file. Check its pixel dimensions against the table above. A canvas set up for screen sharing is usually too small for a large print.
Three ways to print
| At home with a pigment inkjet | Local print shop or giclée studio | Print on demand | |
|---|---|---|---|
| Upfront cost | High: printer, inks and paper | None | None |
| Cost per print | Low to medium, once you count ink and failed prints | Highest for single prints, lower for a run | Fixed price per print, paid when one is ordered |
| Control | Full. You see every print | High. You can proof and talk to the printer | You approve the file, not each print |
| Maximum size | Limited by the printer, often around A3 on desktop models | Large | Large |
| Time and shipping work | You print, pack and ship everything | You collect, then pack and ship | Printed and shipped to the buyer for you |
If you want to make art prints at home, use a printer with pigment inks. They resist fading far better than the dye inks in ordinary office printers.
A local print shop suits a short run for a fair or an exhibition. Print on demand suits selling online, because nothing is printed until someone buys.
Paper or canvas
Fine art paper shows the most detail and suits watercolor, drawing, illustration and photography. It needs a frame or a mat for protection.
Canvas suits paintings that were made on canvas, and it hangs without a frame or glazing. Very fine line work looks softer on its woven surface.
How to make prints of your art to sell
Decide between an open edition and a limited edition first. An open edition can be printed without limit, while a limited edition is capped at a fixed number, signed and numbered, and never reprinted once sold out.
Whichever you choose, order one proof before you sell anything. Hang it next to the original in daylight and correct the file if the color or brightness is off.
Making prints with Printumo
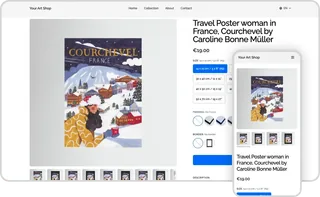
Printumo is a print-on-demand service for wall art. You upload the file once, and each print is made when it is ordered and shipped to the buyer. An account is free.
You can order a print for yourself without connecting a store, which is how to proof your color. There is 30% off the prints and frames in your first order when you place it within 48 hours of signing up. Create a free account to start.
Each size shows a quality dot based on your file's pixels. If some sizes fall short, the AI upscaler can rebuild the artwork with up to 4 times the pixels in each direction when a print is ordered. It costs nothing extra on your first 3 products. It cannot fix a blurry, crooked or shiny photo, and a very small file may still print soft at the largest sizes.
If you sign your prints, choose a mat on an unframed fine art paper print. The mat is printed as a border in the sheet around the artwork, which leaves a margin for a signature.
Frequently asked questions
How do I make prints of paintings without a scanner?
Photograph the painting. Light it evenly from both sides at about 45 degrees, set the camera square to the center on a tripod, and fill the frame.
What resolution do I need to digitize artwork for printing?
Scan at 300 to 600 dpi at the original size, and higher if you plan to enlarge. For the finished file, aim for 300 DPI at the printed size on fine art paper and 150 DPI on canvas.
How do I turn a canvas painting into prints?
Photograph it before varnishing, with even light and no glare, then edit the file to match the original. A 24 megapixel photo that fills the frame is enough for a canvas print of 60 x 90 cm (24 x 36 in).