


Gallery wall layout ideas: 8 layouts with sizes and spacing

A gallery wall layout works when three things are fixed before you pick up a drill: the outline of the whole group, one gap used between every frame, and the height of the center.
The short method: choose a layout from the list below, keep 5 to 8 cm (2 to 3 in) between frames, and place the center of the whole arrangement about 145 to 150 cm (57 to 60 in) from the floor. Above a sofa, keep the lowest frame 15 to 25 cm (6 to 10 in) above the sofa back instead. Test it with paper templates first.
Eight gallery wall ideas with sizes
Every recipe uses standard print sizes. The footprint is the outer width and height of the group, counted on print sizes. Frames add a few centimeters (more on that below).
| Layout | Pieces | Gap | Footprint (width x height) |
|---|---|---|---|
| Grid of six | Six 30x40 cm | 5 cm | 100 x 85 cm (39 x 33 in) |
| Row of three | Three 50x70 cm | 6 cm | 162 x 70 cm (64 x 28 in) |
| Pair plus center | One 50x70 cm, two 30x40 cm | 6 cm | 122 x 70 cm (48 x 28 in) |
| Anchor with satellites | One 70x100 cm, three 30x40 cm | 5 cm | 115 x 100 cm (45 x 39 in) |
| Salon-style mix | One 50x70 cm, two 40x50 cm, two 30x40 cm | 5 cm | 140 x 85 cm (55 x 33 in) |
| Staircase climb | Four 30x40 cm | 8 cm | 144 cm (57 in) along the wall |
| Picture ledge | 50x70, 40x50, 30x40 cm and A4 | Overlapping | 120 cm (47 in) ledge |
| Corner wrap | Four 40x50 cm | 5 cm stacked, 8 cm from the corner | 48 x 105 cm (19 x 41 in) on each wall |
1. Grid of six
Two rows of three 30x40 cm portraits. Width: three times 30 cm plus two 5 cm gaps is 100 cm. Height: two times 40 cm plus one gap is 85 cm.
A grid suits a series: six botanical prints, six photos in black and white. Use identical frames and measure carefully, because a grid shows every millimeter of drift.
2. Row of three
Three 50x70 cm portraits in a line with 6 cm gaps: 150 cm of art plus 12 cm of gaps is 162 cm. That sits well above a 240 cm sofa, where two thirds of the width is 160 cm.
This is the easiest layout to hang: align the top edges with a level.
3. Symmetric pair plus center
One 50x70 cm portrait in the middle with a 30x40 cm portrait on each side, all centered on the same horizontal line. Width: 30 + 6 + 50 + 6 + 30 is 122 cm.
It works above a console, a bed or a fireplace, anywhere the furniture itself is symmetric.
4. Large anchor with satellites
One 70x100 cm portrait, and beside it a column of three 30x40 cm prints hung landscape (40 cm wide, 30 cm tall). The column is 30 + 5 + 30 + 5 + 30, which is 100 cm, the same height as the anchor. Total width: 70 + 5 + 40 is 115 cm.
Choose this when you own one piece you love and several smaller ones. The anchor carries the wall and the small pieces add detail.
5. Salon-style mix
A looser look with mixed sizes. A dependable start is three columns: two 30x40 cm portraits stacked, one 50x70 cm portrait in the middle, and two 40x50 cm prints stacked in landscape. With 5 cm gaps, the width is 30 + 5 + 50 + 5 + 50, so 140 cm. Both stacked columns are 85 cm tall, and the 50x70 cm piece is centered between them.
From there you can grow it outward with small pieces such as A4. Keep the gap the same everywhere. The even spacing is what holds a mixed wall together.
6. Staircase climb
Four 30x40 cm portraits with 8 cm gaps cover 144 cm along the wall. Each frame steps up to follow the stairs.
To find the height, measure 145 to 150 cm straight up from the step below each frame and put the frame's center there. The centers then form a line parallel to the handrail.
7. Picture ledge
A narrow shelf where frames lean against the wall. On a 120 cm ledge, try a 50x70 cm, a 40x50 cm, a 30x40 cm and an A4 print (21 cm wide). Side by side they need 141 cm, so overlap each neighbor by 7 cm: three overlaps save 21 cm, and the group fits in 120 cm.
A ledge is the layout for people who like to swap art. Nothing is fixed, and you only drill for the shelf.
8. Corner wrap
Two 40x50 cm portraits stacked on each side of a corner. Start each column 8 cm from the corner. Each side takes up 48 cm of wall, and the column is 50 + 5 + 50, so 105 cm tall.
Keep the top and bottom edges level across both walls.
Sell your art with Printumo
Get started with selling your art as canvas and fine art prints
How to plan a gallery wall before you drill
Many people search for a gallery wall layout generator. Paper and tape do that job better than an app, because they show the real sizes on your real wall.
- Lay it out on the floor. Mark the footprint with painter's tape and arrange the frames inside it. Move things until it looks balanced, then take a photo from above.
- Cut paper templates. Trace each frame onto kraft paper and cut it out. Mark where the hook sits.
- Start from the center or the anchor. Tape up the middle piece or the largest piece first, with the center of the whole group at 145 to 150 cm (57 to 60 in) from the floor. Work outward.
- Check the gaps. Cut a strip of cardboard as wide as your gap (5 to 8 cm) and use it as a spacer between templates.
- Drill through the paper. Put the nail through the hook mark and tear the template away.
Gallery wall frames: how to mix and match
A mixed wall looks planned when only one thing varies at a time.
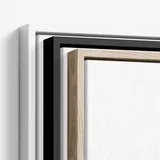
- Limit the frame colors. Two or three is enough: for example black, oak and white.
- Repeat each color at least twice. A single red frame among black ones looks like a mistake. Two look like a choice.
- Keep the mat color consistent. White or off-white mats on every matted piece tie different frames together.
- Mix one variable at a time. If the frame colors vary, keep the profiles similar. If the sizes vary a lot, keep the color the same.
Frames also change your measurements. A frame with a 1.5 cm profile adds about 3 cm to the width and height of each piece. In the grid of six, that turns 100 cm into about 109 cm. Plan with the outside frame size.
Mixing canvas and framed paper
Canvas and framed paper can share a wall. A canvas is thicker and has no glazing, so it reads as heavier. Use it for the anchor piece or spread two or three across the layout, never all on one side.
A floater frame on the canvas in the same color as your paper frames links the two materials.
Choosing art that hangs together
The pieces need one thing in common. Pick one of these and hold to it:
- A shared palette. Different subjects, but the same two or three colors return in every piece.
- A shared subject. All landscapes, all line drawings, all family photos.
- A shared style. One artist, one medium, or one era.
If a piece shares nothing with the others, it belongs on a different wall.
How to hang a gallery wall without nails
Adhesive hanging strips hold light frames on smooth, painted walls. Check the weight rating on the pack against the weight of each frame, and follow the instructions on pressing and waiting time. They are less reliable on textured walls and wallpaper.
A picture ledge needs only a few screws for any number of frames. Leaning art on a sideboard, a mantel or the floor needs none.
If you sell your art: offer sets
A gallery wall needs several pieces that belong together, and buyers find that hard to assemble alone. If you sell prints, group them into sets of two, three or six that share a palette or subject, and say which sizes to order for which layout. Our guide to selling art prints online covers the rest.
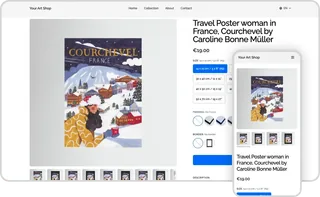
Then show each print in a room. Printumo's mockup generator puts one artwork per mockup into photographed rooms, on canvas or paper, with frames and mats. It does not compose a full gallery wall for you, so photograph or assemble your set picture separately.
Matching frames are simple to offer. Printumo's wooden frames for fine art paper prints come in 14 colors: Black, White, Oak Nature, Oak Dark, Grey, Blue, Green, Lilac, Mint, Orange, Teal, Rose, Red and Yellow. Canvas floater frames come in Oak, Dark Oak, White and Black. Mats come in 11 colors.
Frequently asked questions
What is the best spacing for a gallery wall layout?
Keep 5 to 8 cm (2 to 3 in) between frames and use the same gap everywhere.
How high should a gallery wall hang?
Put the center of the whole arrangement at about 145 to 150 cm (57 to 60 in) from the floor. Above a sofa or sideboard, keep the lowest frame 15 to 25 cm (6 to 10 in) above the furniture.
Is there a gallery wall layout generator?
Apps and templates exist, but the most reliable planner is paper. Cut templates to the outside size of each frame, tape them to the wall and adjust until it looks right.
How do you mix and match frames for a gallery wall?
Use two or three frame colors and repeat each at least twice. Keep the mat color the same, and vary only one thing at a time: color, size or profile.
Can you hang a gallery wall without nails?
Yes, for light frames. Adhesive strips work on smooth painted walls if you stay within their weight rating, and a picture ledge holds many frames with only a few screws.